本記事ではSWELLで使われているSwiperを用いて、任意で選んだ好きな記事をスライダーで表示するカスタマイズを紹介します。


応用が利きやすい技術なので、是非カスタマイズで活用してみてください。

SWELLでSwiperを使ってスライダー表示させてみる
まずは簡単なコードでSwiperを使ってみましょう。
サンプル
簡単なスライダー表示になります。
今回はテキストですが、HTMLに画像を入れるのも可能です。
サンプルの作り方
まず、SWELLに格納されているSwiperを読み込みます。
WordPressの管理画面 > 外観 > テーマファイルエディター > functions.php
その他の読み込みファイルはこの下に記述というコメントに下に下記のコードを追記。
  /* その他の読み込みファイルはこの下に記述 */
	wp_enqueue_script('swell_swiper');
	wp_enqueue_style('swell_swiper');
SWELL以外のテーマは下記の記述
function motoki_swiper() {
	wp_enqueue_script('swell_swiper');
	wp_enqueue_style('swell_swiper');
}
add_action('wp_enqueue_scripts', 'motoki_swiper');
Swiperの読み込み条件を付ける場合
もし特定の記事だけにSwiperを読み込みたい場合は条件を付けましょう。
function motoki_swiper() {
  if ( is_single(array('175', '200')) ) { //記事番号を入力
	  wp_enqueue_script('swell_swiper');
	  wp_enqueue_style('swell_swiper');
  }
}
add_action('wp_enqueue_scripts', 'motoki_swiper');
トップページのみに適応したい場合は下記のように記述してもよいでしょう。
function motoki_swiper() {
  if ( is_home() || is_front_page() ){
	  wp_enqueue_script('swell_swiper');
	  wp_enqueue_style('swell_swiper');
  }
}
add_action('wp_enqueue_scripts', 'motoki_swiper');
次に新規記事を作成します。
カスタムHTMLのブロックを作成。
下記のコードを挿入します。
<div class="swiper slider_motoki sample">
    <div class="swiper-wrapper">
        <div class="swiper-slide">1</div>
        <div class="swiper-slide">2</div>
        <div class="swiper-slide">3</div>
        <div class="swiper-slide">4</div>
        <div class="swiper-slide">5</div>
    </div>
    <div class="swiper-pagination"></div>
    <div class="swiper-button-prev"></div>
    <div class="swiper-button-next"></div>
</div>
あとは記事編集の下側にあるカスタムCSS & JSに以下のコードを挿入しましょう。
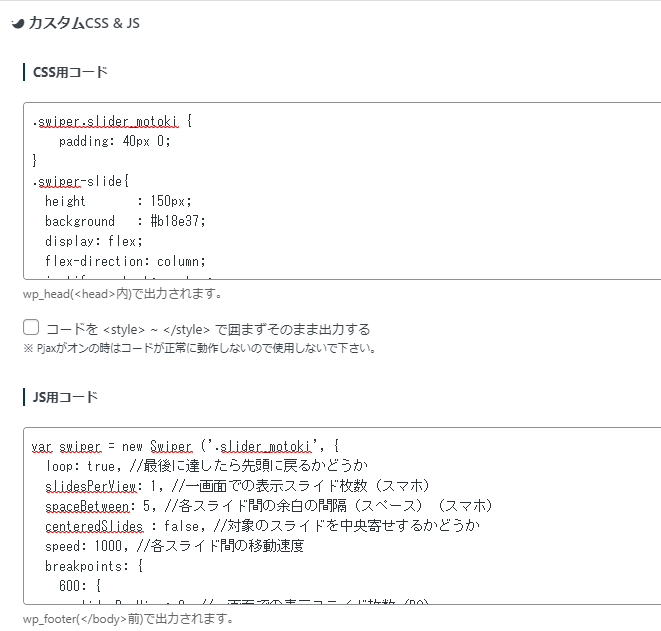
まずは見た目(CSS)から
.slider_motoki.sample .swiper-slide{
    height       : 150px;
    background   : #b18e37;
    display: flex;
    flex-direction: column;
    justify-content: center;
    align-items: center;
    font-size: 4em;
}
.slider_motoki.sample .swiper-pagination-bullet-active{
    background   : #b18e37;
}
.slider_motoki.sample .swiper-button-prev, .slider_motoki.sample .swiper-button-next{
    color: #fff;
    bottom: 10px;
    background: rgb(0 0 0 / 0%);
}
.slider_motoki.sample .swiper-button-prev:after, .slider_motoki.sample  .swiper-button-next:after{
    top: -10px;
}
.slider_motoki.sample .swiper-wrapper {
    box-sizing: content-box;
    display: flex;
    height: 100%;
    position: relative;
    transition-property: transform;
    width: 100%;
    z-index: 1;
}
.slider_motoki.sample .swiper-pagination {
    position: relative;
    box-sizing: border-box;
    display: flex;
    justify-content: center;
    margin-top: 16px;
    width: 100%;
}
.slider_motoki.sample .swiper-bullet {
    box-shadow: none;
    cursor: pointer;
    display: flex;
    text-decoration: none;
}
.slider_motoki.sample .swiper-bullet:before {
    background: #c3c4c7;
    border-radius: 10px;
    content: "";
    height: 10px;
    margin: 4px;
    transition: background .2s ease;
    width: 10px;
}
.slider_motoki.sample .swiper-pagination{
	bottom:0!important;
}
.slider_motoki.sample .swiper-pagination-bullet.swiper-pagination-bullet-active {
    background: #b18e37;
    opacity: 1;
}
次に挙動を設定するJavaScriptを挿入します。
var swiper = new Swiper('.slider_motoki', {
  loop: true, //最後に達したら先頭に戻るかどうか
  slidesPerView: 1, //一画面での表示スライド枚数(スマホ)
  spaceBetween: 5, //各スライド間の余白の間隔(スペース)(スマホ)
  centeredSlides: false, //対象のスライドを中央寄せするかどうか
  speed: 1000, //各スライド間の移動速度
  breakpoints: {
    600: {
      slidesPerView: 2, //一画面での表示スライド枚数(PC)
      spaceBetween: 5 //各スライド間の余白の間隔(スペース)(PC)
    }
  },
  autoplay: {
    delay: 2000, //自動再生の1枚のスライドを待機する速度
    disableOnInteraction: false, //Swiperのautoplayがクリック・フリック後も止まらないようにする
  },
  pagination: {
    el: '.swiper-pagination', //ページネーションの要素
    type: 'bullets', //ページネーションの種類
    clickable: true, //クリックに反応させる
  },
  //ナビゲーションボタン(矢印)表示の設定
  navigation: {
    nextEl: '.swiper-button-next', //「次へボタン」要素の指定
    prevEl: '.swiper-button-prev', //「前へボタン」要素の指定
  },
})以上です。
あとは記事をプレビューするとSwiperによるスライダー表示が確認できます。
SWELLでおすすめの記事をスライダー表示するカスタマイズ
Swiperの表示ができましたら、早速おすすめの記事をスライダー表示してみましょう。
テンプレートの格納
まずはPHPのコードを書かれたテンプレート(motoki_slider.php)をテーマの直下に格納します。
/public_html/motoki-design.co.jp/wp-content/themes/swell_child
下記のコードをテキストエディタでコピペ。
motoki_slider.phpという名前を付けて、テーマ直下に格納しました。
<?php
$article = $args['post__in'];
$args = array(
  'post_type' => 'post',
  'post__in' => $article,
  'post_status' => array('publish'),
  'order' => 'asc',
  'orderby' => 'post_date',
);
$query = new WP_Query($args);
$myposts = $query->posts;

if ($myposts):
?>
<div class="motoki-recommended-slider">
	<div class="swiper slider_motoki">
	  <div class="swiper-wrapper">
		  <?php
          foreach ($myposts as $post):
          setup_postdata($post);
          $cat = get_the_category();
          $catname = $cat[0]->cat_name;
          $image_id = get_post_thumbnail_id($post->ID);
          $image = wp_get_attachment_image_src($image_id, 'full', false, '');
          ?>
		  <div class="swiper-slide">
			  <a href="<?php the_permalink(); ?>">
			  <img src="<?php echo $image[0]; ?>">
			  <div class="slides-date"><?php the_time('Y.m.d');?></div>
			  <div class="slides-article"><?php the_title(); ?></div>
			  </a>
		  </div>
		  <?php
          endforeach;
          wp_reset_postdata();
          ?>
	  </div>
	  <div class="swiper-pagination"></div>
	</div>
	  <div class="swiper-button-prev"></div>
	  <div class="swiper-button-next"></div>
</div>
<?php else: ?>
<?php endif; ?>
functions.phpの記述
functions.phpのコードは下記に記述します。
WordPressの管理画面 > 外観 > テーマファイルエディター > functions.php
まずはサンプルで紹介したSwiperの読み込みましょう。
function motoki_swiper() {
	wp_enqueue_script('swell_swiper');
	wp_enqueue_style('swell_swiper');
}
add_action('wp_enqueue_scripts', 'motoki_swiper');
続いて格納したテンプレートをショートコードで読み込みましょう。
function motoki_slide_select() {
    ob_start();
	$args = [
	  'post__in' => array(20175, 20171, 20156),
	];
    get_template_part('motoki_slider',null,$args);
    return ob_get_clean();
}
add_shortcode('motoki_slider_select', 'motoki_slide_select');
SWELL以外の場合
最新の9系はループしない不具合があったので、8系を読み込むことをお勧めします。
function add_swiper_scripts() {
    wp_enqueue_style( 'swiper-css', 'https://unpkg.com/swiper@8/swiper-bundle.min.css');
    wp_enqueue_script( 'swiper-js', 'https://unpkg.com/swiper@8/swiper-bundle.min.js', array(), false, true );
}
add_action( 'wp_enqueue_scripts', 'add_swiper_scripts' );
CSSとJS
CSSはお好みで調整しましょう。
本サイトにあうように微調整しています。
.swiper-slide{
    width: 48%;
    display: flex;
    flex-shrink: 0;
    position: relative;
    transition-property: transform;
}
.swiper-wrapper {
    box-sizing: content-box;
    display: flex;
    height: 100%;
    position: relative;
    transition-property: transform;
    width: 100%;
    z-index: 1;
}
.swiper-pagination {
    position: relative;
    box-sizing: border-box;
    display: flex;
    justify-content: center;
    margin-top: 16px;
    width: 100%;
}
.swiper-bullet {
    box-shadow: none;
    cursor: pointer;
    display: flex;
    text-decoration: none;
}
.swiper-bullet:before {
    background: #c3c4c7;
    border-radius: 10px;
    content: "";
    height: 10px;
    margin: 4px;
    transition: background .2s ease;
    width: 10px;
}
.swiper-pagination{
	bottom:0!important;
}

.swiper-pagination-bullet.swiper-pagination-bullet-active {
    background: #b18e37;
    opacity: 1;
}

/*文字部分*/
.swiper-slide{
	box-shadow: rgba(50, 50, 93, 0.25) 0px 2px 5px -1px, rgba(0, 0, 0, 0.3) 0px 1px 3px -1px;
}
.slides-article, .slides-date {
    color: #000;
}
.slides-date {
    padding: 0 1em 0 1em;
    font-size: .8em;
}
.slides-article {
    padding: 0 1em 1em 1em;
    font-size: 0.9em;
    overflow: hidden;
    display: -webkit-box;
    -webkit-box-orient: vertical;
    -webkit-line-clamp: 4;
}
/*矢印関連*/
.swiper-button-next, .swiper-button-prev {
    background: rgb(255 255 255 / 0%);
    color: #b18e37;
}
.motoki-recommended-slider {
    position: relative;
}
.motoki-recommended-slider .swiper-button-prev{
    left: -2em;
}
.motoki-recommended-slider .swiper-button-next{
    right: -2em;
}
サンプルと同じです。JSは記事下のコード欄にいれましょう。
var swiper = new Swiper('.slider_motoki', {
  loop: true, //最後に達したら先頭に戻るかどうか
  slidesPerView: 1, //一画面での表示スライド枚数(スマホ)
  spaceBetween: 2, //各スライド間の余白の間隔(スペース)(スマホ)
  centeredSlides: false, //対象のスライドを中央寄せするかどうか
  speed: 3000, //各スライド間の移動速度
  breakpoints: {
    600: {
      slidesPerView: 3, //一画面での表示スライド枚数(PC)
      spaceBetween: 6 //各スライド間の余白の間隔(スペース)(PC)
    }
  },
  autoplay: {
    delay: 3000, //自動再生の1枚のスライドを待機する速度
    disableOnInteraction: true, //Swiperのautoplayがクリック・フリック後も止まらないようにする
  },
  pagination: {
    el: '.swiper-pagination', //ページネーションの要素
    type: 'bullets', //ページネーションの種類
    clickable: true, //クリックに反応させる
  },
  //ナビゲーションボタン(矢印)表示の設定
  navigation: {
    nextEl: '.swiper-button-next', //「次へボタン」要素の指定
    prevEl: '.swiper-button-prev', //「前へボタン」要素の指定
  },
})
以上です。
最後に[motoki_slider_select]のショートコードを記事に中に記述してスライダーの表示を確認しましょう。
まとめ
本記事では「SWELL│おすすめの記事をスライダー表示するカスタマイズ」について書きました。
スライダー表示は動いて目につきやすいだけでない、スマホでもコンパクトに要素を表示させることができる機能です。
応用が利きやすいので、ぜひ本記事のカスタマイズを試してみて下さい。