
ちょっとしたブログカードであればカスタムブロックを作成するのですが、
ちょっと込み入ったカスタマイズはカスタムフィールドを使用しています。
そんな時にブロックを生かしつつ、カスタムフィールドの値を参照するにあたって
記事パーツを参照しつつ、値をショートコードで表示するという組み合わせもよく使います。
ということで、参照した記事にショートコードでカスタムフィールドの値を割り当てる方法をまとめてみました。

参照した記事にショートコードでカスタムフィールドの値を割り当てる方法の準備
早速、準備していきます。
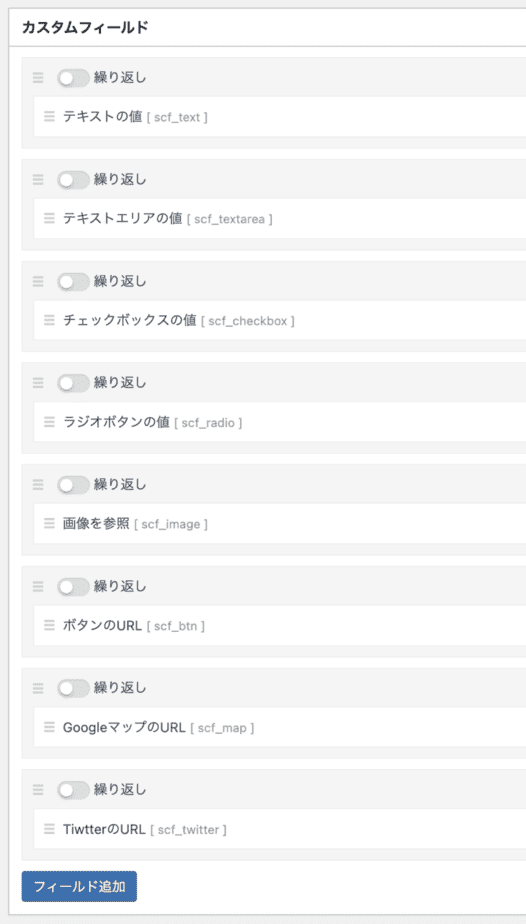
カスタムフィールドの作成
今回はSmart Custom Fieldsというプラグインを使用しています。
使用したいカスタムフィールドの種類と名前を入力します。
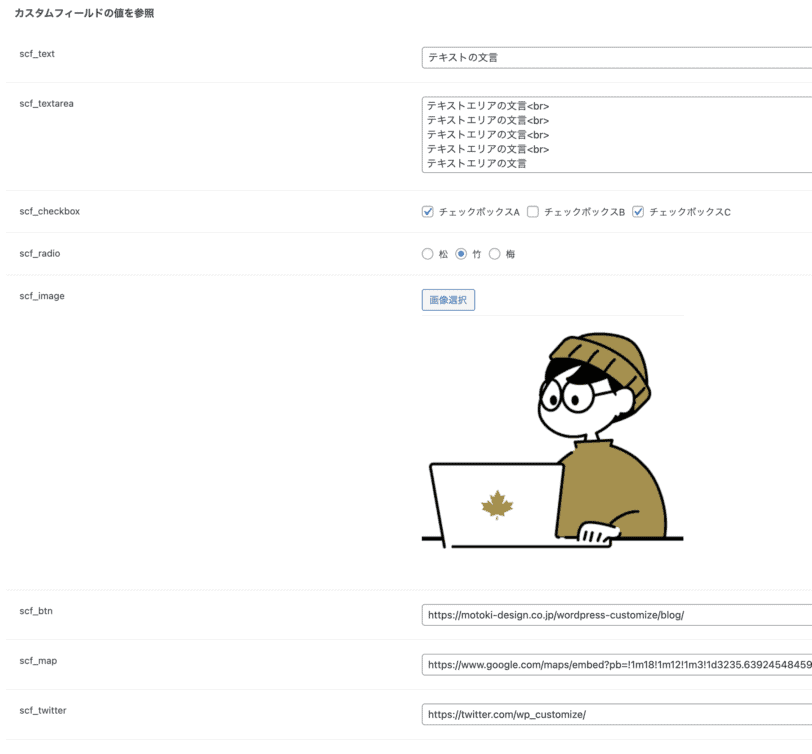
投稿記事のカスタムフィールドを記載
表示したい投稿記事下に作成したカスタムフィールドが表示されているので、文言や画像、URLを設定します。
functions.phpの記載
管理画面 > 外観 > テーマエディタ > functions.php に下記のコードを記載します。
//汎用
function motoki_shortcode_custom_field( $atts ) {
	$post = get_post();

	$atts = shortcode_atts(
		array(
			'field' => '',
			'type'  => 'text',
		),
		$atts,
		'custom_field'
	);

	$field_value = SCF::get( $atts['field'], $post->ID );

	if (empty($field_value)) {
		return 'No such custom field';
	}

	switch ( $atts['type'] ) {
		case 'text':
		case 'textarea':
			return $field_value;
		case 'image':
			return wp_get_attachment_image( $field_value, 'large' );
		case 'checkbox':
			return implode( ', ', $field_value );
		case 'radio':
			return $field_value;
		default:
			return 'Invalid type specified';
	}
}
add_shortcode( 'custom_field', 'motoki_shortcode_custom_field' );

//ボタン(SWELL)
function motoki_btn_shortcode( $atts = array(), $content = null ) {
	$atts = shortcode_atts(
		array(
			'field_name' => 'scf_btn',
			'text'       => 'no_name',
		),
		$atts,
		'motoki_btn'
	);

	$post_id = get_the_ID();

	$field_value = SCF::get( $atts['field_name'], $post_id );

	if (empty($field_value)) {
		return 'No such custom field';
	}

	if ( $field_value ) {
		$shortcode = '<div class="swell-block-button is-style-btn_normal"><a href="' . esc_url( $field_value ) . '" class="swell-block-button__link"><span>' . esc_html( $atts['text'] ) . '</span></a></div>';
		return $shortcode;
	} else {
		return '';
	}
}
add_shortcode( 'scf_btn', 'motoki_btn_shortcode' );

//GoogleMap
function motoki_google_map_shortcode() {
	$post = get_post();

	$map_url = SCF::get( 'scf_map', $post->ID );

	if (empty($map_url)) {
		return 'No such custom field';
	}

	return '<iframe src="' . esc_url( $map_url ) . '" width="600" height="450" style="border:0;" allowfullscreen="" loading="lazy"></iframe>';
}
add_shortcode( 'scf_map', 'motoki_google_map_shortcode' );

//Twitter
function twitter_shortcode() {
	$post_id = get_the_ID();

	$field_value = SCF::get( 'scf_twitter', $post_id );

	if (empty($field_value)) {
		return 'No such custom field';
	}

	if ( $field_value ) {
		$username  = basename( parse_url( $field_value, PHP_URL_PATH ) );
		$shortcode = '<a class="twitter-timeline" data-height="500" data-width="375" href="https://twitter.com/' . esc_html( $username ) . '">Tweets by ' . esc_html( $username ) . '</a><script async src="https://platform.twitter.com/widgets.js" charset="utf-8"></script>';
		return $shortcode;
	} else {
		return '';
	}
}
add_shortcode( 'scf_twitter', 'twitter_shortcode' );
参照元の記事を作成
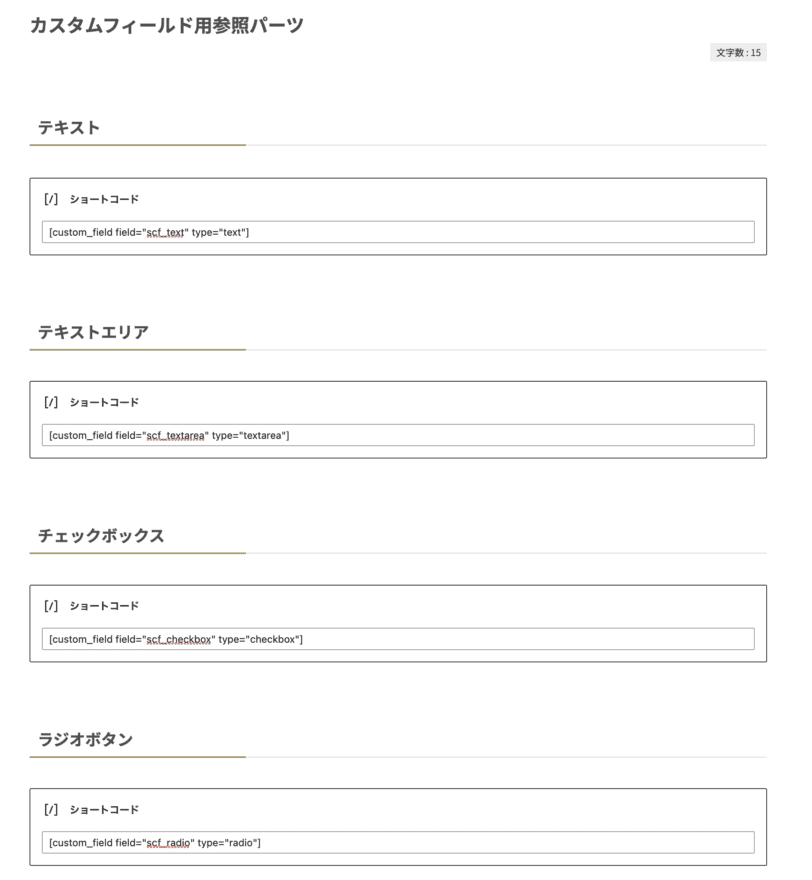
今回はSWELLのブログパーツに参照する記事を作成しました。
ショートコードを入れていきます。
汎用のショートコードは[custom_field field="scf_text" type="text"]のようにカスタムフィールド名と割り当てたい種類を記載。
ボタンのショートコードは[scf_btn text="詳しく見る"]のようにボタンの文言を記載。
GoogleMapやTwitterやのショートコードは[scf_map]のようにそのまま記載。
と言った感じです。
参照した記事にショートコードでカスタムフィールドの値を割り当てた結果
以下、実際の表示結果です。
今回はSWELLのブログパーツからショートコード付きの記事を参照。
そして参照元にあるカスタムフィールドの値を入力して表示した結果になります。
テキスト
No such custom field
テキストエリア
No such custom field
チェックボックス
No such custom field
ラジオボタン
No such custom field
画像
No such custom field
ボタン
No such custom field
Googleマップ
No such custom field
No such custom field
まとめ
先述したように記事のカスタムフィールドに情報をもたせつつ
ブロックで汎用パーツを作ってショートコードで参照する方法はよく使ってます。
気になった方は是非試してみてください。