
SWELLというブロックエディタをメインとしてテーマにはブログパーツというものがあり、
そこで書いた記事を投稿記事や固定記事に参照して使うことができるのでとても便利です。
こういった他の記事を参照する仕組みをクラシックエディタでも使いたい!というニーズがあると思いましたので、
今回、ショートコードで参照するカスタマイズを作成してみました。

クラシックエディタで記事の中に他の記事を参照する方法
カスタマイズ方法は簡単です。
functions.phpにコードを入れて、あとはショートコードを入れれば参照できるという簡単な仕組みです。
カスタム投稿タイプの作成
まずは参照用の記事を用意しましょう。
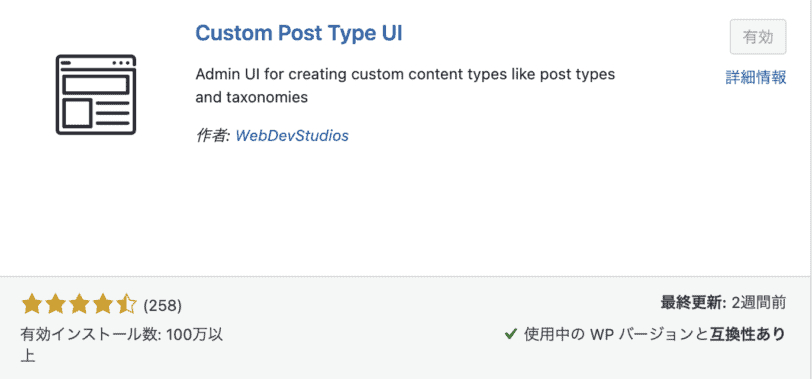
プラグインでCustom Post Type UIと検索してインストール、有効化します。
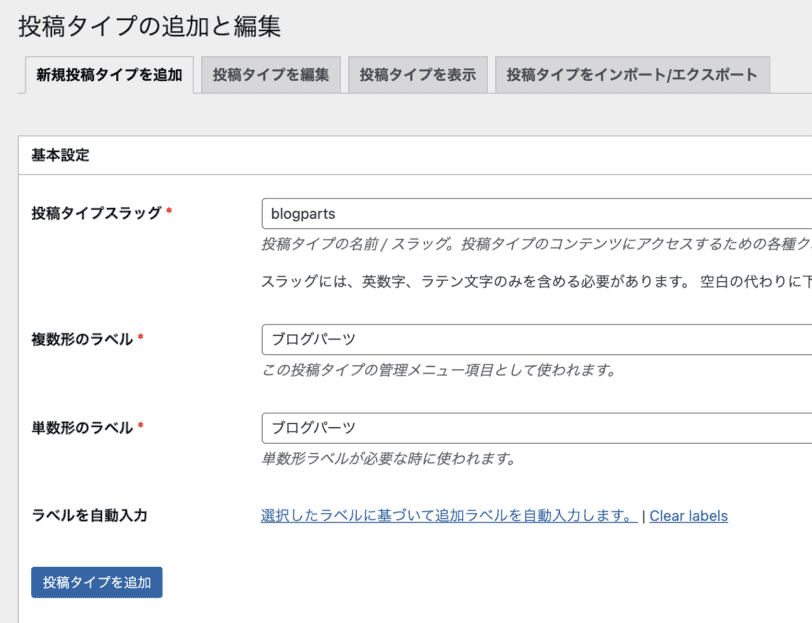
管理メニューにCPT UIというメニューがあるので、そこからカスタム投稿タイプを新しく作成します。
入力箇所は3箇所でOK。
blogpartsという名前のカスタム投稿タイプを作成しました。
functions.phpの作成
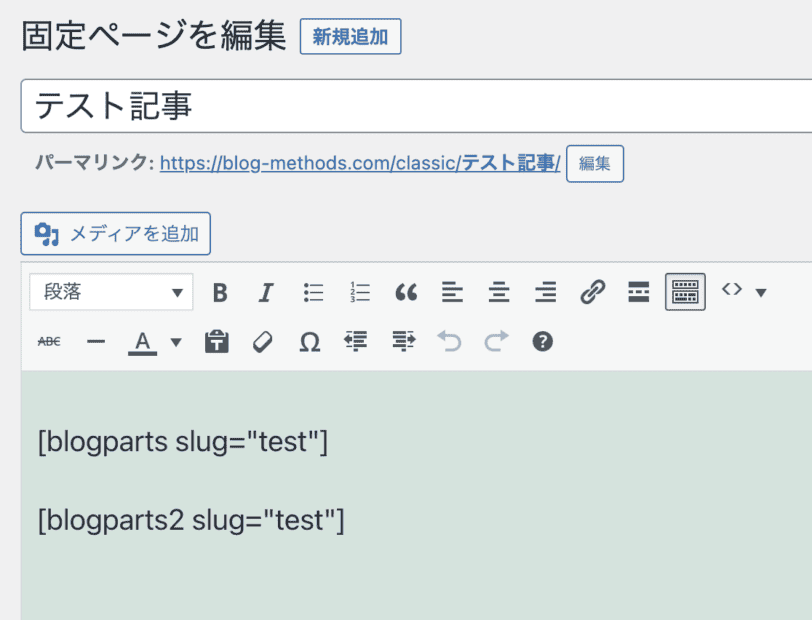
管理画面 > テーマエディタ >functions.phpまたはCode Snippetsのプラグインから下記のコードを挿入します。
function motoki_show_custom_post_type($atts) {
    $atts = shortcode_atts(array('slug' => ''), $atts, 'blogparts');

    $my_posts = get_posts(array(
        'name'        => $atts['slug'],
        'post_type'   => 'blogparts',
        'post_status' => 'publish',
        'numberposts' => 1
    ));

    if( !$my_posts ) {
        return '';
    }

    $post = $my_posts[0];
    setup_postdata($post);
    $content = apply_filters('the_content', $post->post_content);
    wp_reset_postdata();

    return $content;
}

add_shortcode('blogparts', 'motoki_show_custom_post_type');
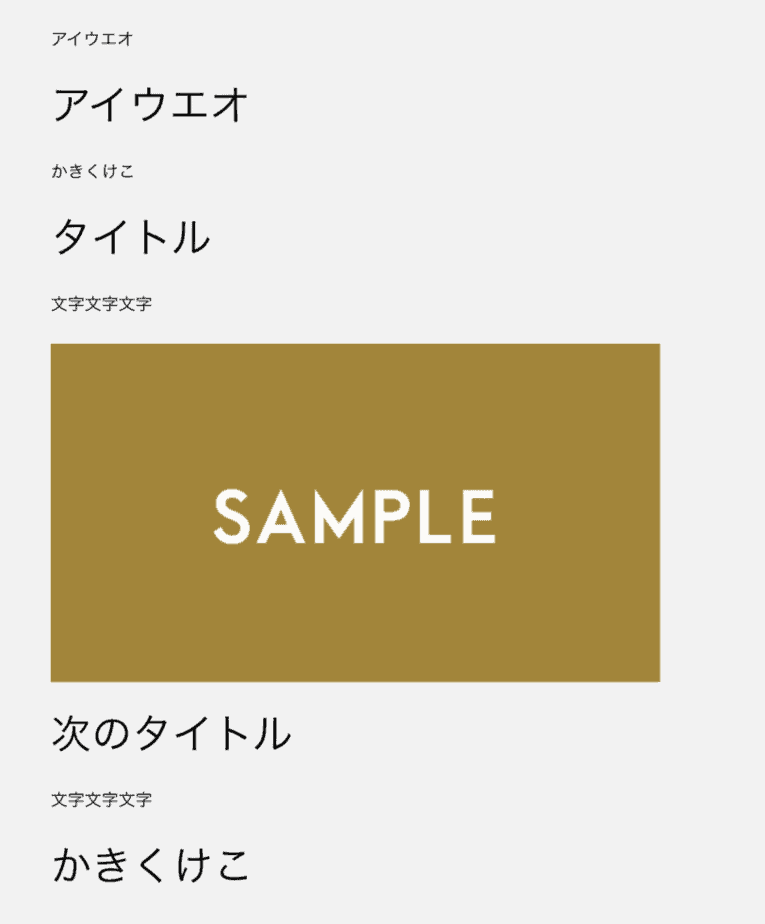
参照元の記事を作成
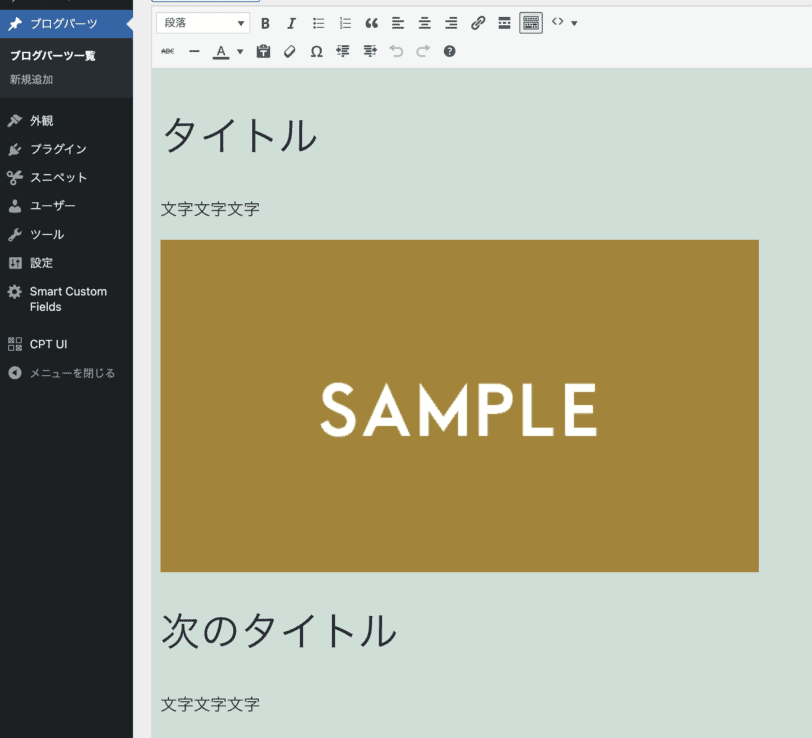
管理画面のブログパーツからクラシックエディタの記事を作成します。
記事のスラッグはtestという名前にしました。
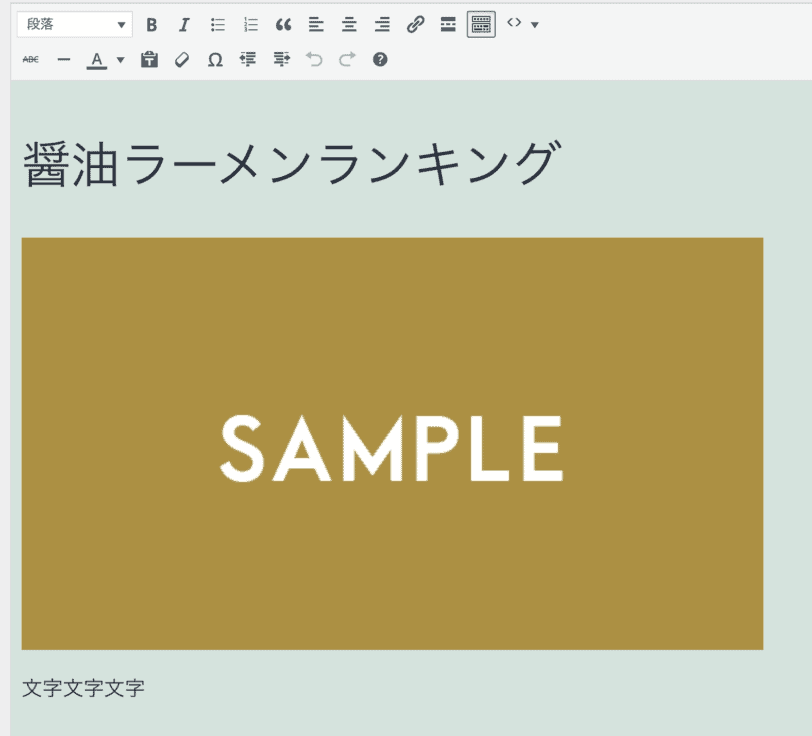
記事の参照
固定記事に記事を書いて、間に下記のショートコードを挿入します。
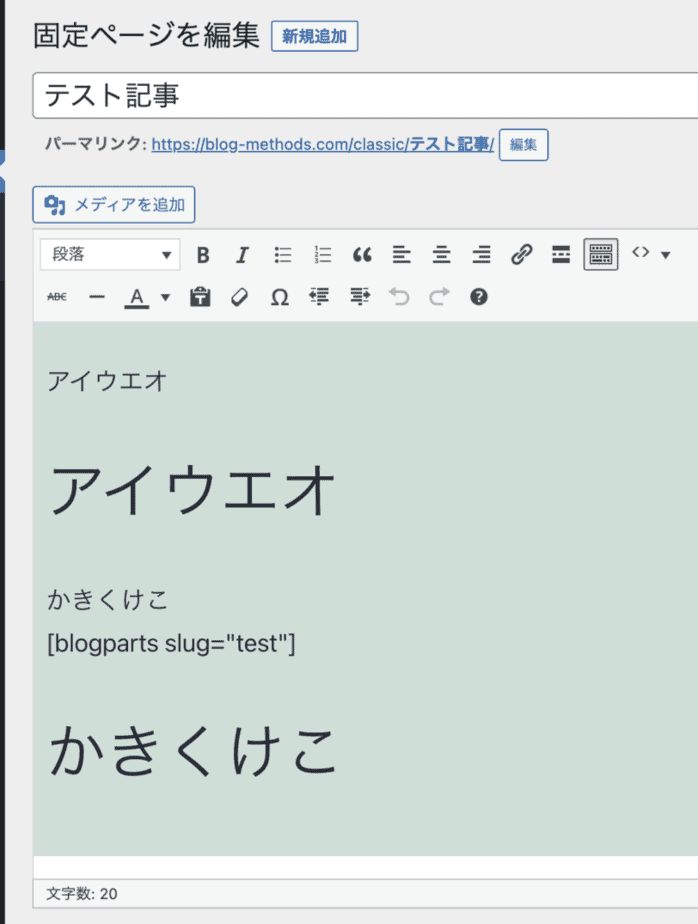
※記事のスラッグ名を入力
[blogparts slug="test"]最後に確認しましょう。
ばっちり参照元の中身が挿入されました。
応用例│ショートコードの中身を文字置換する方法
例えば参照しているデータの一部を変更したいことがある。
例えば醤油ラーメンのデータを参照しているが、その店は塩ラーメンも扱っている場合
同じデータを参照しつつタイトルを変更したい場合に、ショートコードの中身の文字置換もできる。
具体的なコードは以下になります。
<?php echo str_replace('醤油ラーメン', '塩ラーメン', do_shortcode('[blogparts slug="test"]')); ?>もちろんショートコード化も可能。
function replace_shortcode( $atts ) {
    $atts = shortcode_atts(array('slug' => 'test',),$atts,'blogparts2');
    $output = str_replace('醤油ラーメン', '塩ラーメン', do_shortcode('[blogparts slug="' . $atts['slug'] . '"]'));
    return $output;
}
add_shortcode('blogparts2', 'replace_shortcode');
ブログパーツの中身は以下の通り
ショートコードで参照。
結果は以下の通り。
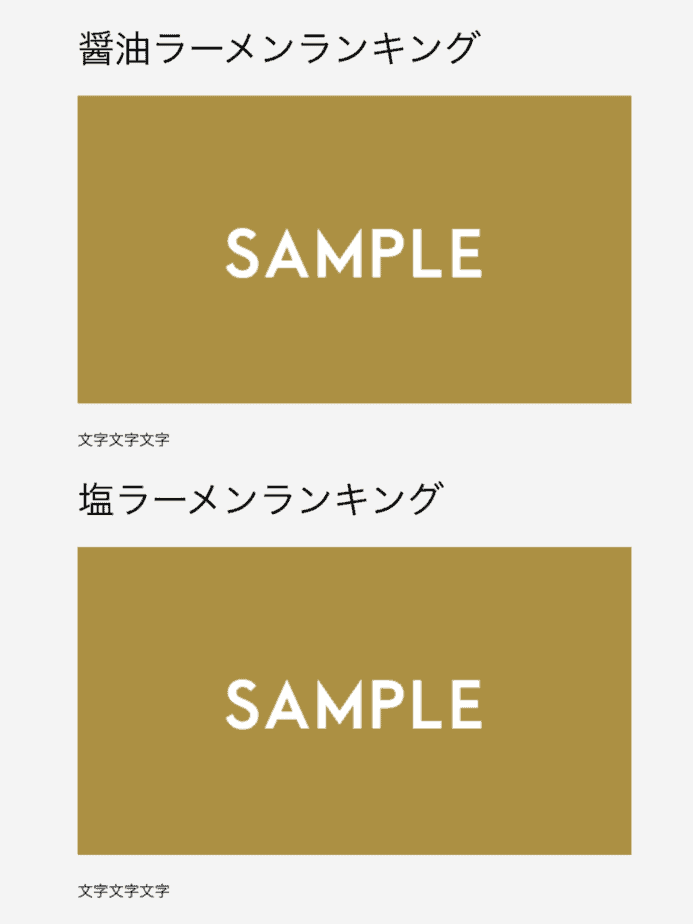
参照元は同じだが、タイトルを変更することもできる。
応用例2 条件分岐しつつ参照する方法
ACFという有名なプラグイン(基本無料、一部の機能だけ有料)を使って、
参照記事のエディターを複数設置します(カスタムフィールドのリッチ エディター (WYSIWYG))
試しにカスタム投稿タイプbloppartsの中のtesttというスラッグの記事の中に、2つカスタムフィールドをブログパーツに割り当てて適当な文字を入力してみました。
functions.phpのコードを下記に変えます。
function motoki_show_custom_post_type($atts) {
    $atts = shortcode_atts(array('slug' => '', 'field' => ''), $atts, 'blogparts');

    $my_posts = get_posts(array(
        'name'        => $atts['slug'],
        'post_type'   => 'blogparts',
        'post_status' => 'publish',
        'numberposts' => 1
    ));

    if( !$my_posts ) {
        return '';
    }
    $post = $my_posts[0];
    setup_postdata($post);

    $content = get_field($atts['field'], $post->ID, false);
    wp_reset_postdata();
    return $content;
}

add_shortcode('blogparts', 'motoki_show_custom_post_type');
あとは投稿記事や固定記事に参照するだけです。
自動整形はOFFにしています。false部分
$content = get_field($atts[‘field’], $post->ID, false);
ショートコードに参照したい記事のスラッグとカスタムフィールドを指定します。
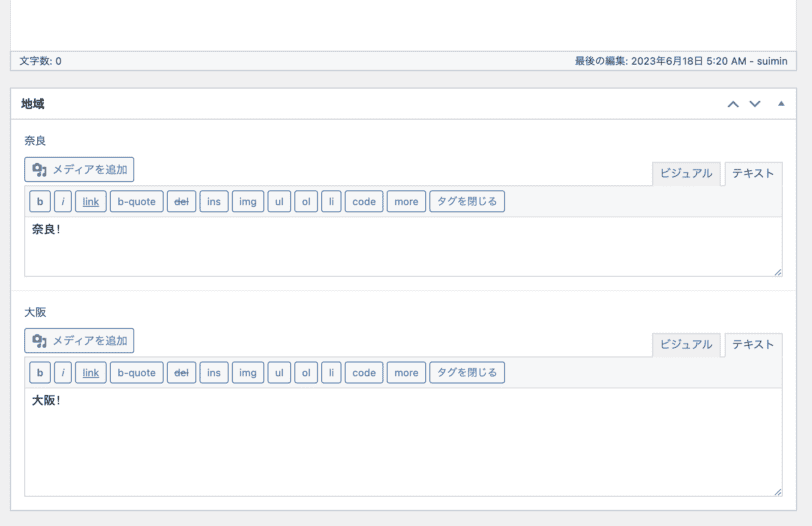
- ブログパーツのtestという記事の中 ‘nara’ フィールドの値を取得:
[blogparts slug="test" field="nara"] - ブログパーツのtestという 記事の中 ‘osaka’ フィールドの値を取得:
[blogparts slug="test" field="osaka"]
以上で特定の記事のカスタムフィールドを参照できました。

応用例3 複数箇所で条件分岐しつつ参照する方法
部分的に差分を変更する場合は、ACFの繰り返しフィールド(有料の追加機能)が便利です。
サブフィールドにテキストフィールドを入れて使います。
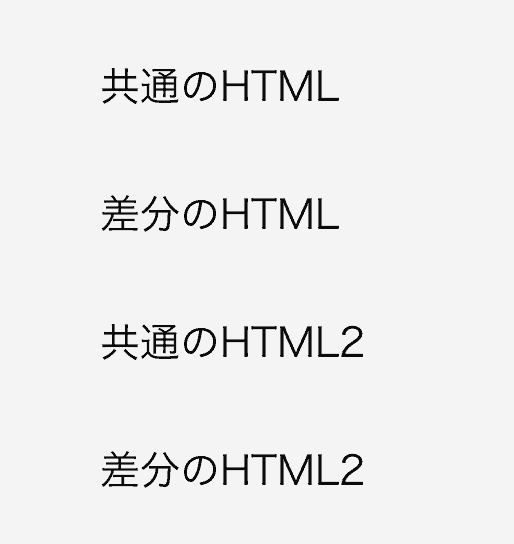
以下を繰り返して使うと、差分の入力箇所を限定してHTMLを入力できます。
- 共通部分のHTML(サブフィールド common_part)
- 差分のHTML(サブフィールド different_part)
function motoki_show_custom_post_type( $atts ) {
	$atts = shortcode_atts(
		array(
			'slug'  => '',
			'field' => '',
		),
		$atts,
		'blogparts'
	);

	$my_posts = get_posts(
		array(
			'name'        => $atts['slug'],
			'post_type'   => 'blogparts',
			'post_status' => 'publish',
			'numberposts' => 1,
		)
	);

	if ( ! $my_posts ) {
		return '';
	}

	$post = $my_posts[0];
	setup_postdata( $post );

	$content = '';
	if ( have_rows( $atts['field'], $post->ID ) ) :
		while ( have_rows( $atts['field'], $post->ID ) ) :
			the_row();
			$common_part    = get_sub_field( 'common_part', false );
			$different_part = get_sub_field( 'different_part', false );
			$content       .= $common_part . $different_part;

		endwhile;
	endif;

	wp_reset_postdata();
	return $content;
}
add_shortcode('blogparts', 'motoki_show_custom_post_type');
以下のような結果になります。
応用例4 共通部分と差分を明確にしつつ条件分岐で参照する方法
応用例3はカスタムフィールドだけでしたが、共通部分は本文に書いて、差分をカスタムフィールドで管理。
それらを条件付きで参照するタイプです。
サブフィールドはwordとしました。
function motoki_show_custom_post_type($atts) {
    $atts = shortcode_atts(array('slug' => '', 'field' => ''), $atts, 'blogparts');

    $my_posts = get_posts(array(
        'name'        => $atts['slug'],
        'post_type'   => 'blogparts',
        'post_status' => 'publish',
        'numberposts' => 1
    ));

    if( !$my_posts ) {
        return '';
    }

    $post = $my_posts[0];
    setup_postdata($post);

    $content = $post->post_content;

    if( have_rows($atts['field'], $post->ID) ):
        while( have_rows($atts['field'], $post->ID) ) : the_row();

            $word = get_sub_field('word', true);

            $content = preg_replace('/{{placeholder}}/', $word, $content, 1);

        endwhile;
    endif;

    wp_reset_postdata();
    return $content;
}

add_shortcode('blogparts', 'motoki_show_custom_post_type');
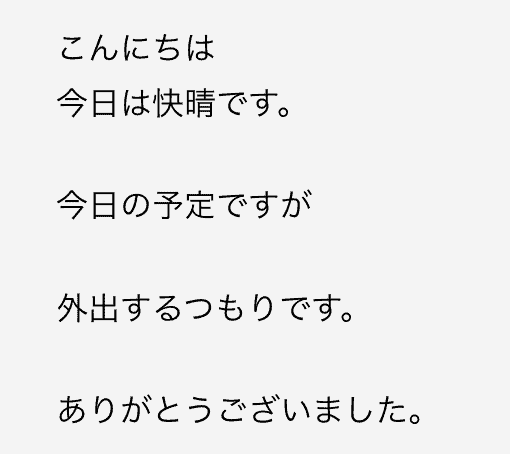
カスタム投稿タイプの本文
こんにちは
{{placeholder}}
今日の予定ですが
{{placeholder}}
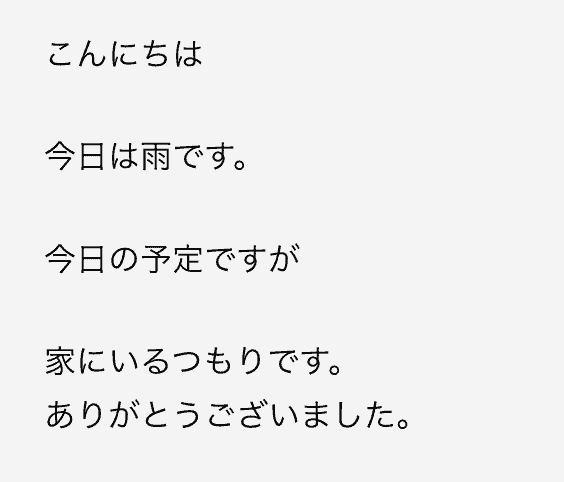
ありがとうございました。カスタム投稿タイプのカスタムフィールド
| 繰り返しフィールド(tokyo) | サブフィールド(word) | |
|---|---|---|
| 1 | 今日は快晴です。 | |
| 2 | 外出するつもりです。 |
| 繰り返しフィールド(osaka) | サブフィールド(word) | |
|---|---|---|
| 1 | 今日は雨です。 | |
| 2 | 家にいるつもりです。 |
あとは同様のショートコードを投稿記事に入れれば表示されます。
要するに差分をカスタムフィールドに持たせつつ、参照できるブログパーツです。
まとめ
よく使う記事パーツは再利用ブロックやブログパーツがおすすめですが、
クラシックエディタの場合は専用のプラグインを導入する必要があります。
そのプラグインも今後更新されるのか不明なので、
今回はシンプルなコードとショートコードで参照するカスタマイズを作ってみました。
気になった方はぜひ参考にしてみてください。